Monday, June 17, 2013

Doodle Guide

Ever caught yourself doodling before a crucial deadline?  Believe it or not, doodling relieves stress and it's actually considered to be a fine art to some.  So what's the secret formula?  Simply let your emotions slide through your pen and draw whatever random thing pops into your head!  If that sounds a little confusing or if you want some inspiration, peruse through the guide below and print out my Doodle Template.

You'll only need a couple basic materials to get started: a pen/pencil/marker and some paper.  However, if you're super dedicated to daily doodling, then get yourself a blank journal and label it "[Insert Name Here]'s Doodle Diary".

Before you even think about touching your pen to your paper, try to purge your mind of self-criticism and the image of perfection.  It's hard to do, but those things just don't mesh with doodling; after all, this is supposed to be relaxing.

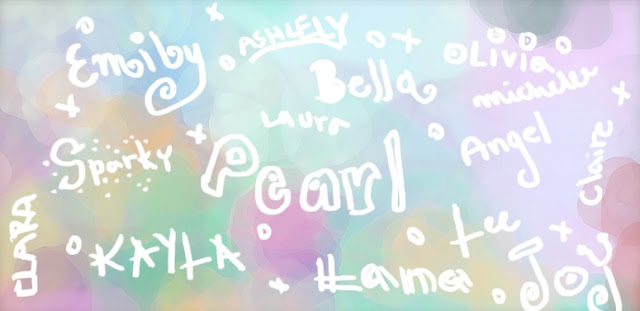
A great way to get yourself comfortable with the concept is to try noodling (name doodling)!  Just write your name a bunch of different ways—in cursive, block, or bubble letters as shown below:
name doodles


Other than writing, doodles can be made into pictures.  Due to the fact that I enjoy nature, I like to create cute animals.  However, you can really do anything you want—let your mind wander!  If you need some quick inspiration, click and print my free Doodle Template—it has a variety of illustrated animals that can be colored in:
doodle template

Want to turn your doodles into a handmade gift?  Try making a card!  Simply measure out a piece of card stock with a ruler, fold it in half, and voilá—you have a blank canvas.  Then, in a variety of pretty colors, create a pretty picture on the cover.  If you want to create your own pretty design, go right ahead, but you can also use my template.  If you need more detailed instructions on how to make a card, head over to my Cute as a Button Card Tutorial.

Whether you enjoy doodling as a past time or if you use it to relieve stress, I hope you found this post a useful resource.

I'd love to see how your unique doodle creations have turned out!  Please send me a picture through my Facebook or email.  Then, I'll choose a winner and feature them in my next post.

Have fun doodling!

Kelly

Thursday, February 14, 2013

Craft Your Calendar: Paint February

Sometimes the best thing to do to beat the winter blues is to craft!  The next installment to my monthly calendar tutorial features a pretty hand-drawn picture that is sure to lighten your mood.  Since I've been learning a lot of painting techniques in my art class lately, I wanted to showcase the lovely world of watercolor.  Step-by-step below, I illustrate how to get started with painting in a simple and quick way by creating a wash, which is basically a light glaze of color.  For a quirky and creative spin, you can also apply white crayon beforehand to create a neat effect.  I hope you give painting a try—who knows, it could turn out to be your own hidden niche.

You really only need a few basic art materials for this project including the free printable February Template, watercolor paper, a white crayon, a set of watercolors, a watercolor palette for mixing, a paintbrush, a light source (a light box or a window works fine), water, and some paper towels.

1.  Print the template on regular printer-paper, and then cut a piece of watercolor paper to eight and one-half by eleven inches.  Layer the thicker paper over the template and trace over a light source using a white crayon.  This effect, while invisible at first, will create a waxy surface that will resist the water.

2.  Put some water in your paint and experiment by mixing colors to create neat shades and tints.  You don't want your paint consistency to be too thin or thick—somewhere in between works well.

3.  Using a paintbrush (I used a thick one to cover more area), cover you paper in a little water, so that the pores in the watercolor paper soak it up.  Then, paint over the paper, revealing the magic of the white crayon.  I suggest using a dark colored paint so that the white crayon will show though better.

4.  Fill in the detailed parts of the drawing with a smaller paintbrush. Next, dab over the white crayon using a paper towel to sop up any extra watercolor.  Let you calendar dry, and you're done!

5.  If you want to take full advantage of your leftover template, you can do a craft with it as well.  Using some thick markers, I colored my template, and put it in my school binder, to keep reminders for myself throughout the month.

If you enjoy watercolor, and have experimented with creating washes, try making a composition.  Above is the painting I made for my art class, which was the inspiration for this tutorial.  If you enjoyed this craft, don't forget to come by next month, and check out my calendar template for March.

Update: on the templates, I have left the days blank, so that his series can be used for many years to come!  Also, the names of the weeks have been omitted, so that any country can enjoy the calendar tutorials.  If you want, you can fill the blanks in by hand with a marker, to create the same effect as shown in the tutorial.

Happy Valentines day :)

Kelly

Tuesday, January 8, 2013

Hairstyles by Myself: Trendy Fishtail Braid

Braided hairstyles are "in" this season and it's essential to know how to create your own fishtail (or herringbone) braid.  This look throws a spin on the classic braid and turns it into a modern and chic statement.  It's also surprisingly simple to do—you're sure to get the hang of it right away.  Depending on what accessories you use, it can be dressed more formally or casually.  No matter what the circumstance though, you're sure to get noticed for wearing such a unique and beautiful hairdo!

Step One:  Start with dry and detangled hair.
Step Two:  If you want, add an accessory such as a headband or hair clip before you braid so that you don't mess up the style later.
Step Three:  Bring all of your hair over to one shoulder and divide it in half.
Step Four:  With your fingers, separate a small piece of hair from the front section and pass it to the other side.

 Step Five:  Take a piece of hair from the back section and pass it to the front (hint: smaller hair pieces will create a more intricate braid and larger ones will create a chunkier braid).
Step Six:  Repeat this process of passing hair back and forth between the two large sections of hair.
Step Seven:  Once you reach the end of the braid, secure it with an elastic (I used a clear one so that it wouldn't be as noticeable).
Step Eight:  For a softer look, gentle tug the sides of the braid to loosen it a bit and you're done!

This hairstyle is so versatile—it can be soft and loose or chunky and edgy—depending on your style!  I'd love to know how you would style your braids in the comments below.

Another (equally cute) variation of this hairstyle is to section off a small piece of hair from the top of your head and braid it fishtail style.  If you have shorter hair that can't be put into a side braid, this is a great style to try!  As you can see, there are endless ways to style this type of braid and I hope you find one that works for you.  I'd love to hear how you will throw your own spin on this braid in the comments below.

Try something new,

Kelly

Wednesday, January 2, 2013

Craft Your Calendar: Stitch January

Create your calendar this year by learning new crafting techniques every month and using my free printable templates.  For January, I decided to make a pretty wintery scene that captures the wonder of the frosty season.  In this tutorial, I wanted to showcase embroidering techniques for beginners in a simple, yet detailed way.  If you've never embroidered before, I encourage you to try it out—you may end up loving it!  However, if stitching isn't your thing, you can certainly do whatever kind of craft that suits your fancy!  You could color it in, decoupage it, paint it. . . the options are endless.  Once you're done, hang it on the wall for all to admire or put it in a binder as a reminder for school or work.

Step-by-step below, I'll demonstrate three basic embroidery stitches—the running stitch, the french knot, and the backstitch.  You can use these techniques however you want to on your template or use my examples as inspiration!

Materials:  Click and print the free January Template on thick paper, scissors, practice paper, needle, and embroidery floss in several complementary colors.
 
To prepare a needle and thread for embroidery stitches, cut a stretch of embroidery floss (no more than 18 inches so it doesn't tangle) and tie a knot close to one end.  Thread your needle onto the opposing side of the knot (use a wide-eyed needle to accommodate larger thread).

Note:  I recommend that before begin on your template, you practice and perfect these techniques on a recycled sheet of paper.

Here's how to do the running stitch. . .
This dashed stitch is a must-know because it is very common and easy to do.

1.  Poke your needle up through the paper and pull until you reach the knot.  Then, simulate an "under-over" pattern with the needle and thread, creating stitches about one centimeter long.  You'll notice that this stitch creates a line of dashes.

2.  On the backside of your paper, you should see your knot and the same dashed pattern.

In your template, you can apply the running stitch anywhere you want.  I used the same "under-over" concept of the running stitch to create a snowflake, instead of a line.

Here's how to do a french knot. . .
This embroidery technique is one of the prettiest stitches and is surprisingly easy to do.  Practice it a couple of times and you're sure to get it!  Note: this tutorial demonstrates the technique right-handed, but if you are left-handed, simply reverse the hand positions.

1.  Poke up through the spot you want to create a french knot.  In one hand, pull the thread coming though the paper taught and in the other hand, hold the needle.

2. Wrap the needle around the thread about two times.

3.  In a place close to where the thread came out, poke the needle back through the paper.

4.  Keep pulling the needle through until a little knot is created.

In all the places where there are dots on your template, you can apply the french knot.  If you don't want to do a french knot, another option would be to create little X's over the dots.

Here's how to do a backstitch . . .
The backstitch is a great technique to use if you want to create a solid line.

1.  Begin this stitch as you would for a running stitch: poke the needle up through the paper and go over, under, and come up again.  

2.  To fill in the gap created, go back to the last stitch made, and poke the needle through it about 1/4 way though.  Repeat this process by coming up to make a stitch again and then filling in the gap.

I used the backstitch for the solid lines in the template including the boots, tights, dress, and mittens of the girl.

I hope you enjoyed this tutorial and picked up a few embroidery techniques along the way.  I'm interested in knowing how you will decorate your template and how you're going to use it!  Remember to check back at the beginning of every month for a new template and craft that goes with it.  If you have any questions or comments, I would love to hear from you.

Thanks for stopping by,

Kelly

Thursday, December 27, 2012

Hairstyles by Myself: Twisty Little Bun

This simple twist on a bun hairstyle is a great way to make a subtle statement and keep the hair out of your face.  Bonus: If you don't know how to french braid this is a great hairstyle to try because it has the same modeled look, but is a lot easier!  Also, it lets you inch in another day out of your blow dry.  However, if you do this hairstyle on wet hair, you'll achieve pretty beach waves when you undo it later.  This is the perfect holiday party hairstyle as well and to gussy it up even further, you can accessorize with headbands and hair clips (check out my previous DIY's to learn how to make these!)

Step One:  Start with tangle-free hair.
Step Two:  To texturize, scrunch hair with hands, using a product if necessary.
Step Three:  Section off a small piece of hair at the top of the head and divide it in half.  Twist the two pieces of hair together and add more hair to one section.
Step Four:  Continue the same process of twisting and adding hair down your head.

Step Five:  Twist and add hair along the back of your head, near the hairline, until you run out of hair.
Step Six:  Using an elastic, secure the hair at the base of the twist, creating a ponytail.
Step Seven:  Twist your ponytail into a bun.
Step Eight:  Place bobby pins along the base of the bun to keep it in place.

Step Nine:  Accessorize by adding a headband or hair clip as shown above (optional).
Step Ten:  Apply hairspray to keep style in place and fluff the twist for a softer look (optional).

This was my first attempt at a hair DIY and it was a lot of fun to put together!  I hope this tutorial helped you create a beautiful hairstyle—I'd love to hear your feedback and see pics of what you've created on my Facebook page!  Also, let me know if you'd like to see more segments of "Hairstyles by Myself" in the future!

Thanks for stopping by,

Kelly